dead embryos

What are the reasons for dead embryos at an early incubation stage?

Dead embryos at early stage can be caused by:
  • A diseased parent flock.
  • Improper nutrition of breeders e.g. the use of mouldy feed or feed lacking micronutrients
  • Eggs are cracked, dirty or wet.
  • Improper egg cleaning and fumigation.
  • Eggs stored improperly or for too long before incubation.
  • Improper incubation parameters such as too high or too low temperature or humidity or insufficient egg turning during the incubation period. (See questions number 21, 22 and 25 for more details on proper
    temperature, humidity and turning rate)
  • Inbreeding can cause early embryonic mortality.
embryos in eggs

Reasons for a low rate of embryos in eggs

Low rate of embryos in eggs is often caused by:
  • The male-female rate of the parent flock is not suitable: insufficient or
  • excessive number of roosters.
  • Imbalance of maturity or size between males and females also affects mating success.
  • Spurs are not trimmed causes severe scratching of hens and then hens will run from mating attempts or roosters have malformed toes making it difficult for them to keep balance on the back of the hens during mating.
  • Improper design of the breeding house, affecting the roosters and hens.
  • The parent flock is diseased.
  • Improper feeding practices of the parent flock leading to overweight or late sexual maturity (especially for roosters).
  • Inadequate space – crowding also creates problems. Too much space can also reduce successful matings.
  • Mite or ectoparasite infestations dramatically affect male fertility

What are the problems often encountered in a poultry hatchery

Problems often encountered in a poultry hatchery
  • Low rate of eggs with embryos.
  • Many embryos dead at an early incubation stage.
  • High rate of rotten eggs during incubation.
  • Piped eggs, without hatching.
  • Late hatching or chicks not hatching at the same time.
  • Complete hatch failure
  • Poor quality of day-old birds:
    1) Chicks hatch with crippled and malformed legs.
    2) Chicks hatch with rough or unhealed navel, wet and dirty feathers.
    3) High mortality during the first week of life.
egg shell seedlings

Starts a seedling bed using eggshells

Starting a seedling bed using eggshells is a simple and eco-friendly way to grow plants from seeds. Here is a brief summary of how to do it:

  1. Rinse and dry the eggshells. It’s important to clean the eggshells well to prevent any bacteria or odor from affecting the seedlings. You can also bake the eggshells in the oven for a few minutes to sterilize them.
  2. Crack the top of the eggshells off and remove the egg yolk and white. You can use a small spoon or a toothpick to do this.
  3. Fill the eggshells with soil or seed starting mix. Make sure to leave enough space at the top for the seeds.
  4. Plant the seeds according to the instructions on the seed packet. It’s generally a good idea to plant one or two seeds per eggshell, depending on the size of the seeds.
  5. Water the seeds gently, using a watering can or a spray bottle. Be careful not to overwater, as the eggshells may break if they get too wet.
  6. Place the eggshells in a sunny location, such as a windowsill or greenhouse. The seedlings will need plenty of sunlight to grow.
  7. Once the seedlings have grown large enough, you can transplant them into pots or your garden. To do this, gently crack the bottom of the eggshells and gently pull the seedlings out, being careful not to damage the roots. Then, plant them in their new location and water them well.

Using eggshells to start seedlings is a fun and eco-friendly way to grow plants from seeds. With a little bit of care and attention, you can have a beautiful bed of seedlings in no time.

kienyeji

Answers to Kienyeji chicken farming

What is Kienyeji chicken?

There are Kari improved, Kuroiler, Kenbro and Rainbow Roaster.The term ‘improved Kienyeji’ generally refers to an indigenous chicken breed obtained from natural cross-breeding between two superior breeds of Kienyeji chickens or a Kienyeji chicken and an exotic breed.Kari improved is a pure Kienyeji bird bred from a range of indigenous chickens in Kenya with known superior characteristics like growth rate and egg production.

How long does it take for Kienyeji chicken to start laying eggs?

 On average, pullets, or juvenile hens, start laying eggs at about 5 months of age, depending on the breed. Larger, heavier birds like Kuroiler, Kari improved and Rainbow will lay on the later side whereas lighter, smaller breeds like kenbro will start laying sooner.

Is Kienyeji chicken farming profitable in Kenya?

Poultry farming in Kenya is becoming one of the most profitable businesses in Kenya due to demand of kienyeji chicken by big hotels and restaurants. … The improved kienyeji chicken – this type of chicken is reared for meat production in Kenya. These chickens grow faster and are usually ready for market after approximately 3 months.

How long does it take for Kienyeji chicken to mature?

The entire development and egg laying process takes 25 to 26 hours per egg. Once an egg has been laid, it will take approximately 21 days after incubation begins to hatch into a fully developed chick.

What is improved Kienyeji chicken?

The term ‘improved Kienyeji’ generally refers to an indigenous chicken breed obtained from natural cross-breeding between two superior breeds of Kienyeji chickens or a Kienyeji chicken and an exotic breed

How much does it cost to start a poultry farm?

Cost are varied from city to city and depends on your facility also. Minimum ksh 20,000  for 500 chickens. investment for a thousand chicks is around ksh 50,000 – 100,000. poultry farm requires one square feet for one chick.

At what age do chickens stop laying eggs?

Chickens usually don’t simply “stop” laying eggs when they get to a certain age, but they will lay fewer as they get older. That said, most laying breeds will lay more or less productively in backyard terms for two or three years.
How to start a poultry farm in Kenya

How to start a poultry farm in Kenya

ItemDescriptionApproximate Cost (KES)
ChicksDay-old chicks (e.g., layers or broilers)100 – 150 per chick
FeedStarter and grower feed for the first few months3,000 – 5,000 per 50kg bag
HousingConstruction of a coop or shed50,000 – 200,000
Feeding and Watering EquipmentFeeders and drinkers5,000 – 10,000
Vaccines and MedicationBasic vaccinations and medications2,000 – 5,000
Bedding MaterialWood shavings or straw for the coop floor500 – 1,500 per bale
Lighting and HeatingLamps and heaters for chicks4,000 – 8,000
MiscellaneousOther expenses (e.g., transport, labor)Variable

Choose Your Poultry Sector

How to start a poultry farm in Kenya is very common question to newbie poultry farmers. Poultry farming is a wide industry. Basically, there are two types of the farming you can choose from – broilers and layers. Broilers are chicken that you raise for meat. Layers are chicken that you raise for eggs. Then, there is the business of incubating eggs and raising chicks.Many chicken farms do business in multiple sectors. So, decide if you want to operate in all sectors or you want to restrict your business to just one or two sectors of your choice specially in the beginning.Following are the niches you can choose from.Meat production (Broilers breeding)Egg production (Layers breeding)Poultry feed productionChicken breeding (Hatchery)Egg and meat processing

Choose The Type Of Bird

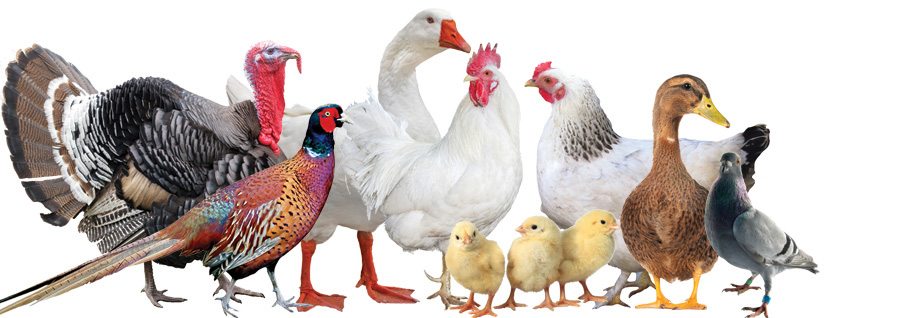
Poultry farm owners rear many types of birds. Your small poultry farm may start by focusing on two to three birds and then include more birds later as the business grows. How to start a poultry farm in Kenya Mostly, poultry farms raise birds such as domestic fowl or chicken as broilers and layers, duck, goose, quail, guinea fowl, turkey, pigeon, and peacock.You should also determine whether to rear broilers or layers. This is basically the choice to start farming for meat production or egg production.

Create Your Farm Logo

Another essential step you should take is to have a unique poultry farm logo for your business. Your logo will be everywhere on your farm products when you market them. The logo will also be on your marketing material such as visiting cards, websites and many other places. Therefore, make sure that your logo becomes a tool to show that you run a professional poultry farming business.

Set Farm Location

You should think of setting your poultry farm at the most appropriate location. It is important that the location has all the necessary facilities. Try to build your poultry farm a little away from the town so that you can have the land and labor at a cheaper cost.However, setting up the farm too far away from the nearest town will be a mistake. Remember that you need to approach a town more often to target your consumers Moreover, a location too away from city may cost you more on transportation.

Get Financial Help

You may not be having much money at hand when starting your own farm. But setting up a poultry farm needs sufficient funding. You will be buying a lot of equipment such as feeders, drinkers, perches, lighting system, incubators, heaters or brooders, and many more. Most importantly, you need a huge amount of funds to purchase land. You will put facilities to enhance your productivity. How to start a poultry farm in KenyaMoreover, you require funds also to pay salaries of your staff/laborers. So, analyse your financial requirements. Then, apply for a bank loan or try some other sources of financing your farming business.

Spread A Word For Your Farm

You meet many people on daily basis. Tell them about your plans to start your own poultry business. Start from talking to your friends and neighbors. Visit events related to poultry farming and try to make friends with as many people as you can. You may meet some of your potential clients. Make all of them aware of your farming plans and take their advice.When you contact people and clients, present your business card to them. This is a professional way to introduce your business. The card gives them your contact details like your phone number, fax number, and website address. They will keep your card and many of them will contact you whenever they need your poultry products.

Total Estimated Initial Cost: 110,600 – 279,650 KES

Formulate chicken diets using Pearson square

The Pearson square, also known as the balancing equation, is a tool used to formulate balanced chicken diets using two ingredients. Here is a step-by-step guide on how to use the Pearson square to formulate a chicken diet:

  1. Determine the nutrient levels of the two ingredients you want to use in the diet. You’ll need to know the crude protein, crude fat, and crude fiber content of each ingredient.
  2. Calculate the nutrient levels of the diet as a whole. To do this, you’ll need to determine the proportion of each ingredient in the diet. For example, if you want to use 50% ingredient A and 50% ingredient B, the nutrient levels of the diet will be the average of the nutrient levels of the two ingredients.
  3. Calculate the nutrient imbalance. Using the nutrient levels of the diet and the desired nutrient levels for your chickens, calculate the nutrient imbalance by subtracting the desired nutrient levels from the actual nutrient levels.
  4. Adjust the proportion of the ingredients. To correct the nutrient imbalance, you’ll need to adjust the proportion of the two ingredients in the diet. To do this, use the Pearson square to solve for the unknown proportion of one of the ingredients.
  5. Recalculate the nutrient levels of the diet. Once you’ve adjusted the proportion of the ingredients, recalculate the nutrient levels of the diet to ensure that it meets the desired nutrient levels for your chickens.
  6. Repeat the process as needed. If the nutrient levels of the diet are still not balanced, you may need to repeat the process of adjusting the proportion of the ingredients and recalculating the nutrient levels until the desired balance is achieved.

Using the Pearson square to formulate a chicken diet can help ensure that your chickens are receiving the proper nutrients for optimal growth and health.

Can you give rice to chickens?

Yes, rice can be fed to chickens as a supplement to their regular diet. Rice is a good source of carbohydrates and can provide chickens with energy. However, it should not be the sole source of nutrients in a chicken’s diet. Chickens also need a balanced diet that includes protein, fat, vitamins, and minerals.

To feed rice to chickens, you can offer it cooked or uncooked. If you choose to feed uncooked rice, it’s important to soak it first to soften it and make it easier for the chickens to digest. You can also mix rice with other ingredients, such as grains or vegetables, to create a more balanced meal.

It’s important to note that rice should not make up a large portion of a chicken’s diet. Chickens can develop digestive issues if they consume too much rice, as it can lead to an imbalance in their nutrient intake. It’s generally recommended to offer rice as a supplement to a chicken’s regular diet rather than as a primary source of nutrition.

How much does a chicken farmer make a year?

It’s difficult to provide an accurate estimate of how much a chicken farmer in Kenya might make in a year, as there are many factors that can impact a farmer’s income. These can include the size of the farm, the type of chickens being raised, the demand for the chickens and their products, the efficiency of the operation, and the cost of inputs such as feed, medication, and labor.

That being said, according to a report by the Kenyan Ministry of Agriculture, the average income for a small-scale chicken farmer in Kenya is approximately KES 50,000 per year (which is equivalent to around $465 USD). This figure may vary depending on the specific circumstances of the farm and the region in which it is located.

It’s important to note that the income of a chicken farmer in Kenya may also be impacted by external factors such as market fluctuations, competition, and changes in government policies. In addition, chicken farming can be a risky venture, as it is vulnerable to diseases and other challenges that can affect the health and productivity of the birds.

brooding

Management of chicks in the brooder from 0-8 weeks

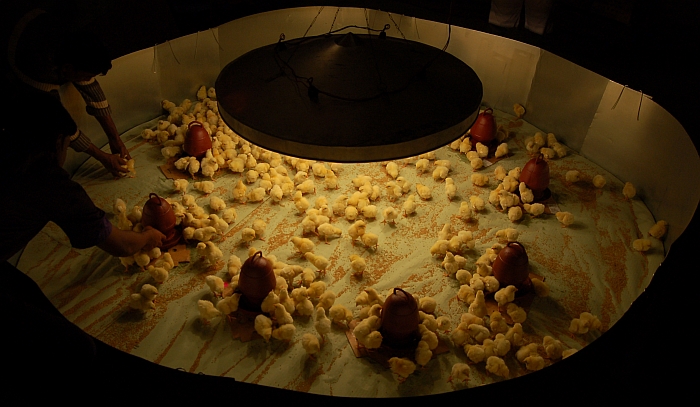
Raising chicks in a brooder involves providing a safe and comfortable environment for them to grow and develop. Here are some steps to follow when managing chicks in a brooder from 0-8 weeks:

  1. Set up the brooder: Choose a well-ventilated, draft-free space and equip it with a heat source, such as a heat lamp or ceramic heater, and a thermometer to monitor the temperature. Line the floor with a bedding material, such as wood shavings or straw, and provide a waterer and feeder for the chicks.
  2. Keep the temperature and humidity at the right levels: Chicks need a warm environment to thrive, but the temperature should not be too hot or too cold. A good starting point is 95-97 degrees Fahrenheit for the first week, gradually reducing the temperature by 5 degrees each week until the chicks are 8 weeks old. Humidity should be kept at around 50-60% during the first week and gradually reduced as the chicks grow.
  3. Monitor the chicks’ health: Keep an eye on the chicks for signs of illness, such as sneezing, coughing, or lethargy. If you notice any issues, isolate the affected chicks and seek the advice of a veterinarian.
  4. Provide a constant supply of clean water: Chicks need a constant supply of clean water to stay hydrated. Check and refill the waterer regularly and make sure the chicks can easily access it.
  5. Offer a high-quality starter feed: Provide the chicks with a high-quality starter feed that is specifically formulated for chicks. Offer the feed in a shallow dish or trough so the chicks can easily reach it. As the chicks grow, gradually transition them to a grower feed.
  6. Keep the brooder clean: Clean the brooder regularly to prevent the buildup of bacteria and parasites. Remove any uneaten feed and wet bedding and replace it with fresh bedding material.

By following these steps, you can help ensure that your chicks grow up healthy and strong.

Back to Top
Call Now
Product has been added to your cart